An incorrectly scaled object in your HoloLens app can make or break your project, so it's important to get scaling in Unity down, such as working with uniform and non-uniform factors, before moving onto to other aspects of your app.
This HoloLens Dev 101 series has been designed to not only help you learn about the Mixed Reality Toolkit and its input module, as well as many other elements of HoloLens and Unity development, but to try and challenge the ideas that we have come to automatically expect when it comes to user interfaces. Standing on the shoulders of giants is relatively easy compared to standing alone and rethinking what has come before.
While using Unity definitely simplifies the process, creating a system that moves, scales, and rotates objects in real-world space is still quite an undertaking. In the previous lesson, we finally made it to moving our objects. As massive as the previous lesson may have seemed, we will be using it directly to create what we need for this lesson. That said, this lesson may seem a bit thin in comparison, but I will add a few coding principles to keep things fresh.
Scaling in Unity
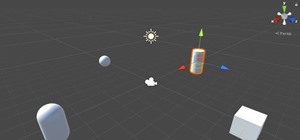
Simply put, scale refers to the size of an object. In Unity, scaling, or changing the size of an object, is handled via the Transform component, much in the same way as changing the position and rotation of an object. Each of these properties contains three elements: X, Y, and Z. For the position, the elements translate to up/down, left/right, and in/out. The X, Y, and Z in scaling have a similar effect but correspond to the size of an object.
If you manipulate the scale of an object, with the same factor across the X axis, Y axis, and Z axis, the effect is uniform scaling. But if you scale at a factor that is non-uniform (such as X = 1, Y = 2, Z = 0.5) across the different axis of the scale property, you'll get a non-uniform scale. In this lesson, we are going to do both and have the option to switch.
The Single Responsibility Principle
If you're interested in learning why we're creating separate classes for our scaling functionality, instead of making one big class that contains movement, scaling, and rotation, you should look into what is known as the SOLID principles. This collection of five object-oriented programming practices are designed to make code resilient to time, scalable, and easily extended.
There are a number of the principles that I'm still figuring out how to best implement (many of them being highly contextual), but the one that we are currently using here, the Single Responsibility Principle (SRP), is a great way to help you break down an application into understandable chunks (and it offers a good bit more).
The principle states that "every module or class should have responsibility over a single part of the functionality provided by the software, and that responsibility should be entirely encapsulated by the class."
So what this means for us is that if, sometime down the road, we have built this system into something more substantial, and for some reason we need to change how the scaling works in the system, when we make those changes, the chances of breaking the rest of the code in the project are lowered to nearly zero.
While going deep into the subject of SOLID is well beyond the scope of this series, I highly recommend taking time to look at those principles. And with that out of the way, if you're ready to go, make sure you have both Unity and Visual Studio up and running. Get the project from the previous lesson loaded, and let's get started.
Step 1: Create the Scale Class
Much like the class we previously created to handle our movement, we are going to create a similar class for scaling our object.
Inside Unity, look in the Hierarchy window. Find and click to select the "Scale" sub-object of "TransformUITool." With it selected, in the Inspector window, click the "Add Component" button, then scroll down and select the "New Script" option.
We should always name our classes with an effort to keep their purpose easily understandable. While being a great way to help you as a system designer maintain your project as it gets larger by breaking a project down into easily manageable chunks, it also helps you lock in and focus in terms of SRP (see above).
With that in mind, we want to name our new class something accurate. "ScaleToolInteraction" seems like a SOLID choice (pun intended). Type that into the new script Name field, then click on the "Create and Add" button.
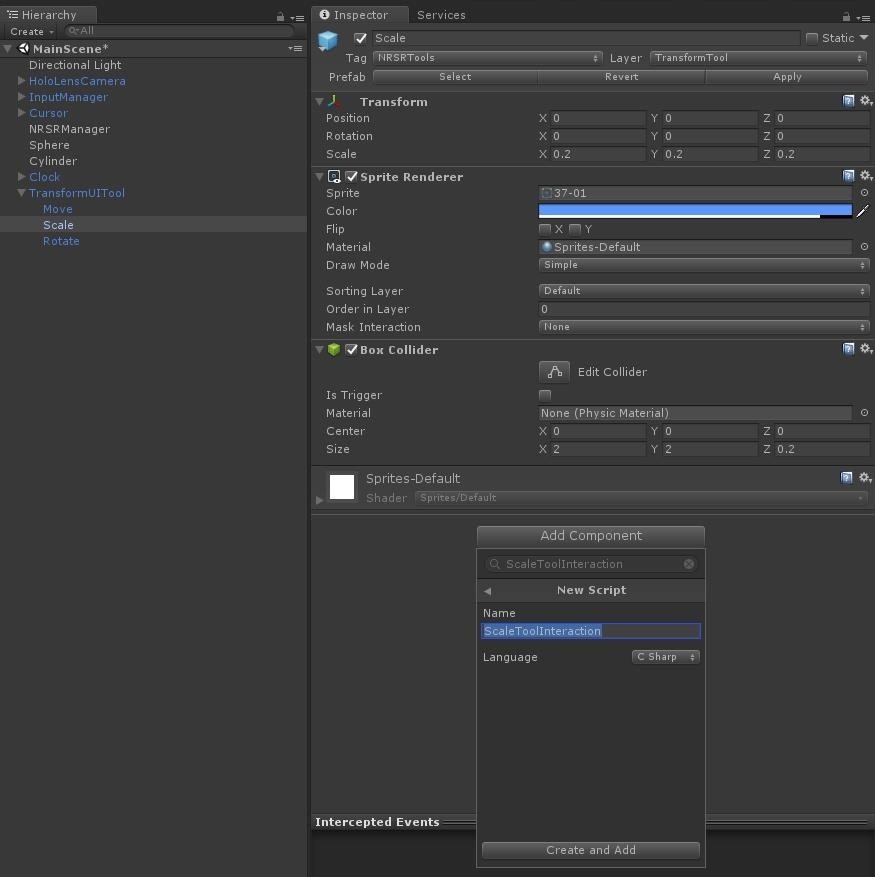
It's time to write some code, so if you don't currently have Visual Studio opened from finishing the last lesson, you can do that now by double-clicking the newly created "ScaleToolInteraction" class file in the Unity Project window.
Once Visual Studio is opened, look for the "MoveTool.cs" tab, and click on it to bring it forward. Now select all the code by using the keyboard shortcut Ctrl + A, then hit Ctrl + C to copy the entire class. (You can also just copy it from our Pastebin link.)
Note: As we are about to literally copy and paste a class into a new class, the Don't Repeat Yourself (or DRY) principle is worth mentioning. It states that "Every piece of knowledge must have a single, unambiguous, authoritative representation within a system." Simply put, don't use the same code in multiple places in a project. The result is that if something breaks, it becomes much harder to find and fix the problem. With that in mind, what we are about to do is use the MoveTool class as a template for the ScaleToolInteraction class. The core logic will be replaced.
Now in Visual Studio, select the "ScaleToolInteraction.cs" tab to make it the active class. Again, use the keyboard command Ctrl + A to select everything in the class, then use Ctrl + V to paste the contents we have in the clipboard to the new class.
Of course, since we just copied one class to another, it now has the wrong name in its class declaration. So, on line 6, change "MoveTool" to "ScaleToolInteraction."

Step 2: Create a Selectable Mode Using an Enumeration
Now we are going to make a switchable mode for scaling based on the uniform and non-uniform types that were mentioned above. We will also be making two types of uniform scale. The first is for moving your hand horizontally (UniformXScale), and the other provides a vertical option (UniformYScale).
In the properties section of our new class, just below our previously declared Camera object and IInputSource object (line 31 if you copied and pasted from the Pastebin link), add the two following lines of code.
public enum TransformMode { UniformXScale, UniformYScale, NonUniformScale }
public TransformMode transformMode = TransformMode.UniformXScale;
In the first line, we are declaring an enum called TransformMode with the three choices we want to have; UniformXScale, UniformYScale, and NonUniformScale. For those who are not familiar with C# and Unity, aside from the typical uses that an "enum" offers to C# programming, like easily switchable code paths, inside the Unity editor when we use a public enum we will see the enum in the Inspector as a drop-down menu.
In the second line, we are creating our TransformMode object based on the enum from the previous line, and we are using camel casing in naming the object "transformMode." We then set the default option to UniformXScale, my personal preference. Whatever we set as the default in the code will be set as the default drop-down option for our class in the Inspector window.

Now it's time for the core logic of the class. Just like we used in the previous lesson, in the "if (IsDraggingEnabled && isDragging)" block of the Update() method, delete the one line of code currently there and replace it with the following block of code.

You can copy and paste the code from the block section below, but I have included the above image due to our system not currently formatting C# code correctly. You can also copy and paste it from Pastebin.
if (transformMode == TransformMode.NonUniformScale)
{
HostTransform.localScale = Vector3.Lerp(HostTransform.localScale,
HostTransform.localScale + manipulationDelta * DistanceScale,
PositionLerpSpeed);
}
if (transformMode == TransformMode.UniformXScale)
{
HostTransform.localScale = Vector3.Lerp(HostTransform.localScale, HostTransform.localScale +
new Vector3(manipulationDelta.x,
manipulationDelta.x,
manipulationDelta.x) * DistanceScale,
PositionLerpSpeed);
}
if (transformMode == TransformMode.UniformYScale)
{
HostTransform.localScale = Vector3.Lerp(HostTransform.localScale, HostTransform.localScale +
new Vector3(manipulationDelta.y,
manipulationDelta.y,
manipulationDelta.y) * DistanceScale,
PositionLerpSpeed);
}
So in order to give life to the enum property we created, and make a selectable choice for a designer inside Unity, here we have three if statements looking for the current transformMode choice that's been selected in the Inspector.
In case you are looking at the above code and uncertain about the "manipulationDelta" variable, the manipulationDelta is a Vector3 structure produced by the input module of the MRTK, which like all of the many Vector3s we have used throughout this project, contains X, Y, and Z elements. This particular Vector3 is the result of the user's interaction with the HoloLens.
To break down its function, a delta in math is, simply put, a difference. Or, in our case, the manipulationDelta is the difference in the movement of the user's hand from one frame to the next. Fortunately, the tough math is handled for us by the MRTK and Unity, and we are handed the results to do with as we please.
In the NonUniformScale option, we are using code very similar to what we used for moving the object in the previous chapter, but applying the results to the object's localScale instead of the object's position. Simple enough. If the user moves their hand horizontally, it scales along the X axis. Vertical movement of the hand changes the scale on the Y axis.
In UniformXScale and UniformYScale, we are taking the manipulationDelta and creating a new Vector3 out of its X and Y elements, respectively. In the X-scale version, all vertical movement of the user's hand is ignored, and the Y-scale version does the same for horizontal movement.
The DistanceScale variable helps us adjust the sensitivity of how our scale works versus the user's hand motion. Our current default works fine for the uniform scale options but is a bit crazy for the non-uniform option.
Step 3: Check Out the New Class in Unity
If you now pull up the Inspector in Unity and look at the "Scale" object, after a few seconds of Unity's behind-the-scene code compiling, you should see our new component appear on the object with all of the new options we have given it.

Notice the Transform Mode drop-down list that was created as the result of our enum. If you click on the list, you will see the full list of enumeration options: UniformXScale, UniformYScale, and NonUniformScale. A great feature that Unity offers is adding spaces in our variables, which is really a nice feature. So "NonUniformScale" in code becomes "Non Uniform Scale" in the Unity editor.

So, now you can choose which transform mode you want to use in the editor, go through the compile and build process, and then try it out. I would recommend trying all of the options and seeing which one feels the most natural to you. Again, if you decide to go with the Non-Uniform scale option, make sure to lower the Distance Scale variable until you find a setting you like. It will be a bit crazy at the default.
With Unity's interface/code design, having these public variables exposed to the Unity editor makes the testing and iterating process simple. It really is a smart design.
Regardless of your choice, in the end, I would love to hear which options you prefer. Until the next one, have fun hacking.
Just updated your iPhone? You'll find new emoji, enhanced security, podcast transcripts, Apple Cash virtual numbers, and other useful features. There are even new additions hidden within Safari. Find out what's new and changed on your iPhone with the iOS 17.4 update.




















1 Comment
It's amazing tutorials, but where is the last chapter, about rotation?
Share Your Thoughts