


Thanks to Project-Infrared, there's now a pretty straightforward way to add motion tracking to the HoloLens: Connect it to a Kinect.
Wavelength LLC's created a way to get the Microsoft Kinect working as a motion-tracking input device for HoloLens, which my colleague Adam Dachis wrote about in October. A few days later, the CEO of Wavelength LLC, Kyle G., and his team, released Project-Infrared to the community as an open-source GitHub repository.
Project-Infrared is a motion-tracking system that uses Microsoft's Kinect and HoloLens. The Kinect takes the input from the movement of the user and transmits an avatar, mimicking the user's movement and displaying it on the Microsoft HoloLens.
The HoloLens sensor array uses the same technology as the Kinect to track hand movement and detect the space you are in. In this case, the external Kinect's purpose is primarily for tracking the whole body. This allows the Kinect to become one of the easiest ways for developers to give thier mixed reality applications natural real-time interactivity. In case you missed our previous post about it, here's what the end result will look like:
Why Motion Tracking?
As developers, designers, and creators, we are always looking for new and exciting ways to interact with our various chosen platforms. With more input options comes new and unique solutions to the problems we are trying to solve. Motion capture has been used by the film and game industries for years, due to its highly expressive detail—everything from hand movements to body language and facial features are picked up and mimicked on screen.
World famous experimental musician and artistic pioneer, Björk, recently held a press conference in a motion capture body suit, using a 3D modeled avatar, to teleport from her home country of Iceland to London. This is quite similar to what many have been trying to do with the HoloLens and "Holoportation".
Björk used this setup alongside Aphex Twin and others for the Day For Night event, a light and sound art installation and performance that happened in Houston, Texas on December 17th and 18th.
While amazing in detail, motion capture runs into problems because it requires a body suit covered in various types of markers, extremely costly capturing equipment, and large spaces in which to film it. Björk's setup is a very expensive solution—something a normal indie developer could never afford on their own. Fortunately, we have the Microsoft Kinect.
What Is the Solution for Us?
Enter motion-tracking, which tracks a user's entire body so they can control their device without a specialized suit, and in a minimal amount of space. Compared to motion capture, motion tracking is a relatively young technology and far less sophisticated. For it to evolve, we need people developing ideas and new use cases.
The only way to do that is by building on each other's successes. Wavelength's Kyle G. says he released the code for their Project-Infrared as open source in response to the needs of an educator in the community: "I can't deny students learning. It's part of my 'no school left behind' belief."
With that in mind, let's walk through how to set this project up, and what we can do with it.
First, let us gather what we will need:
- Microsoft HoloLens
- Kinect Version 2
- Kinect Adapter for Windows
- PC running the following:
- Windows 10 (needed for all HoloLens development)
- Unity 5.5
- Visual Studio Community
- Project-Infrared software from the GitHub repository
Now, I am assuming a working knowledge of Unity and HoloLens development in general, including the ability to build, compile, and deploy code to the HoloLens or HoloLens Emulator.
Set Up Your Hardware & Install Project-Infrared
First, make sure you have Kinect for Windows Runtime 2.0 installed. Then make sure your Kinect is set up with the Kinect Adapter for Windows and connected to your PC.
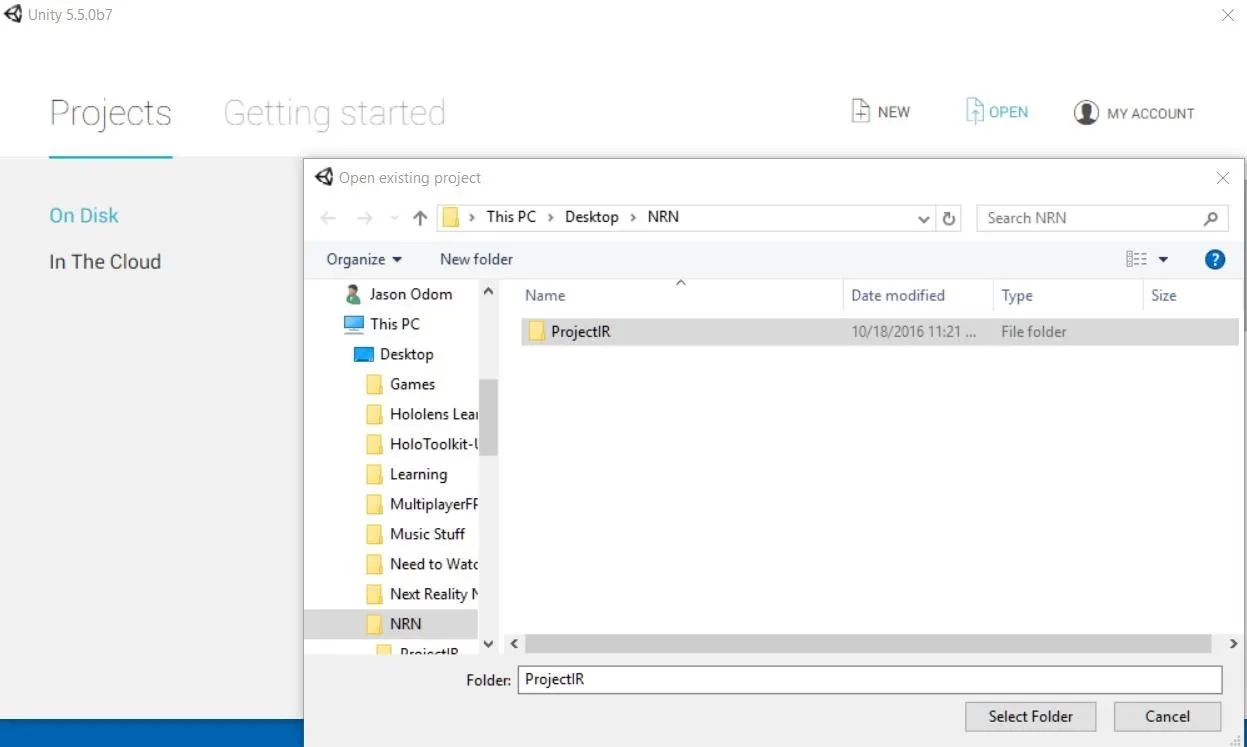
Assuming you have Visual Studio and Unity3D installed, download and open the Project-Infrared ZIP file and extract it to a folder. Now, for simplicity's sake, rename the root project directory from project-infrared-master to ProjectIR.
Load up Unity3D, assuming you have your account signed into, then click on the Open option.
Navigate to the ProjectIR directory and hit the Select Folder button.
Open the ProjectIR folder.
The importing and set-up process can take a while, even on good computers. When finished, your computer screen should look a bit like this:
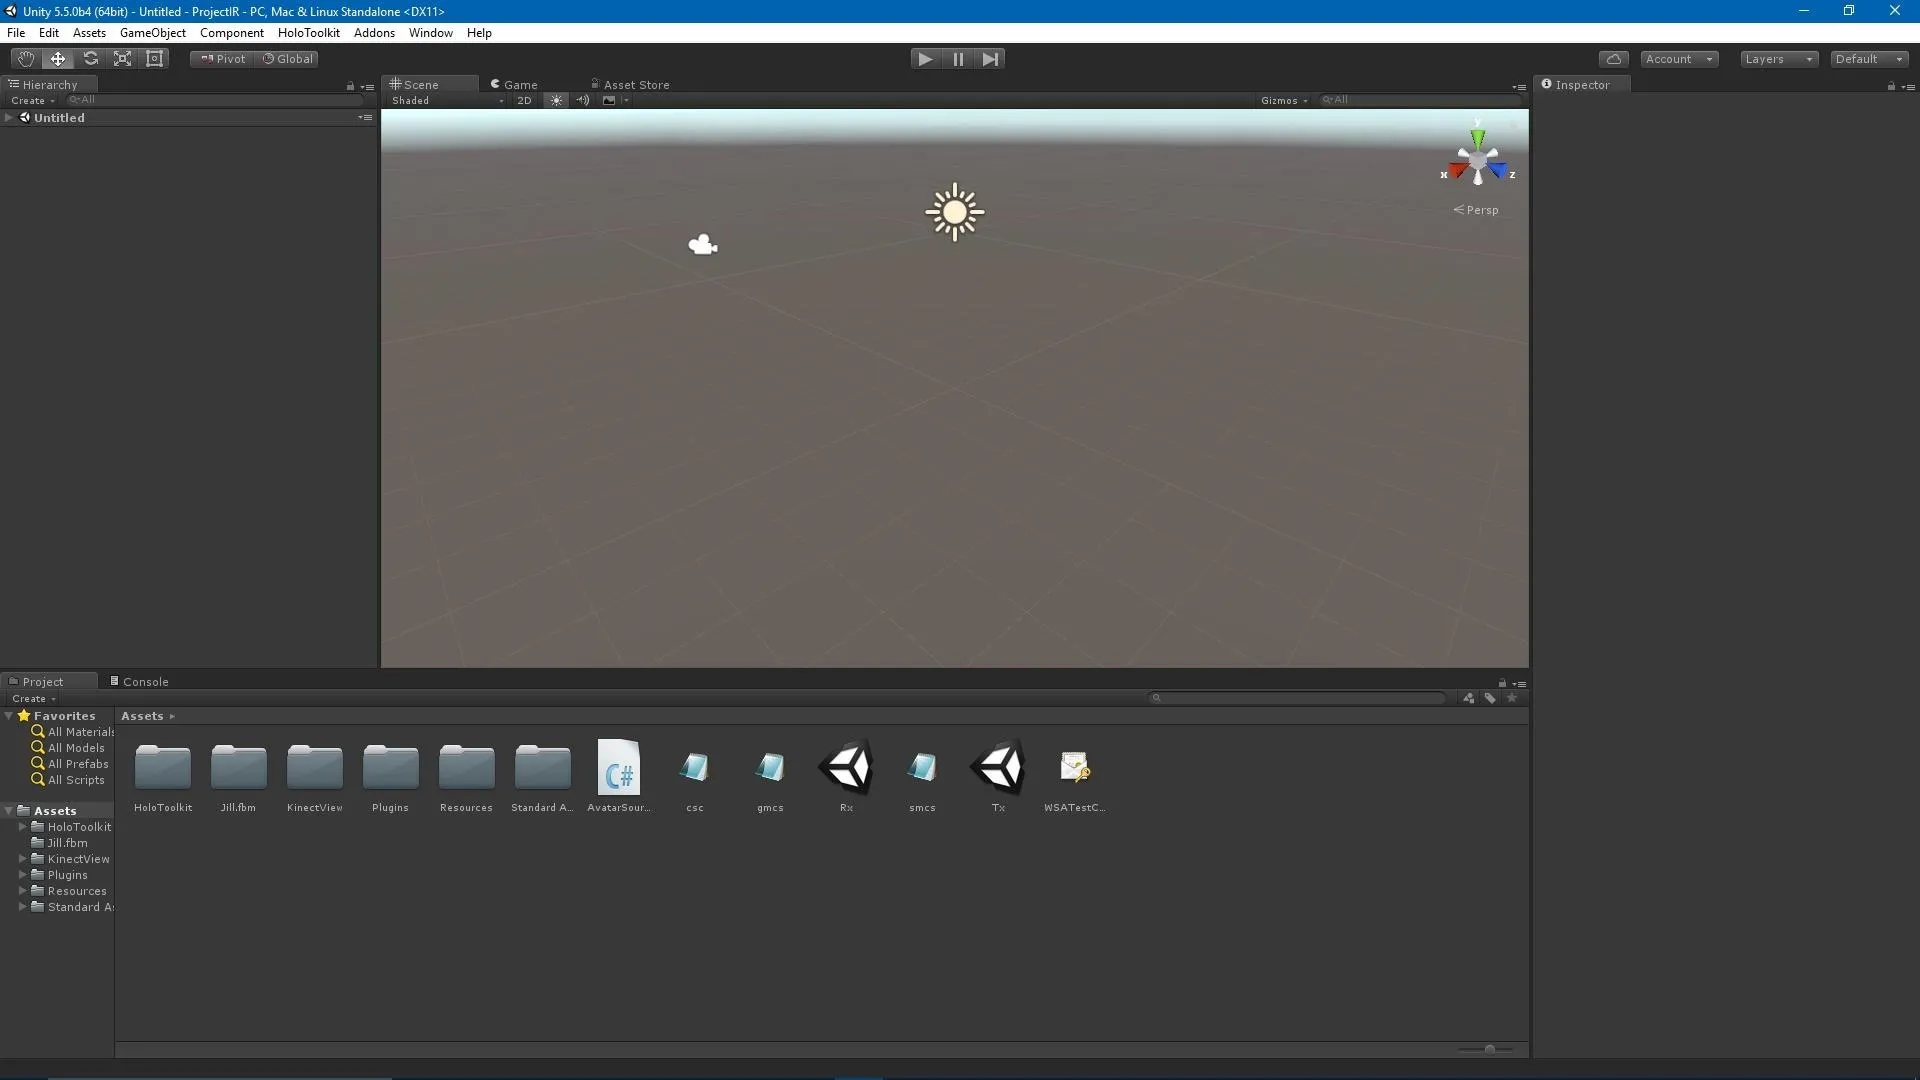
Don't panic if your color scheme is a bit different... I use the Pro version.
Now if you look at the Project window, you will see a root folder called Assets. Select it, and you should see the following:
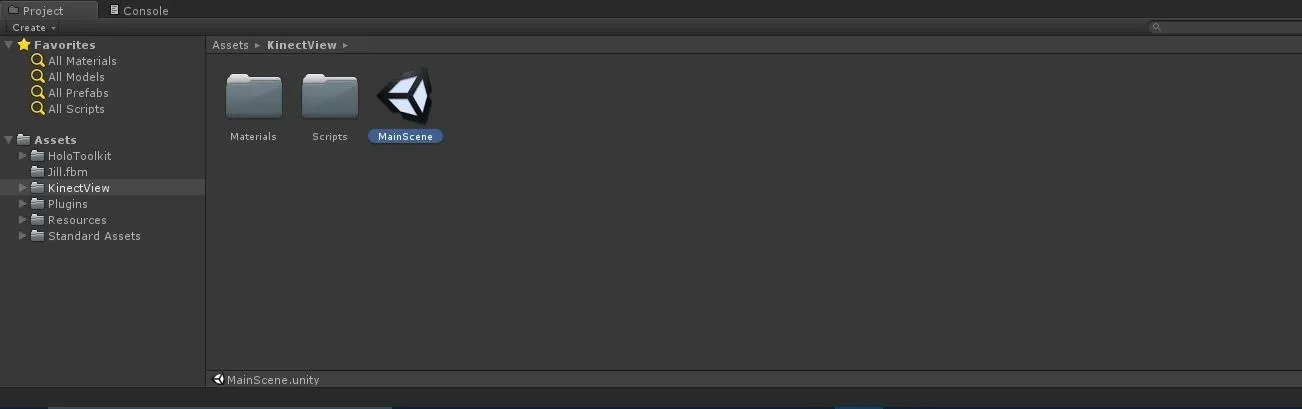
Double-click on MainScene.
When the scene loads up, a grid will appear with a large vertical rectangle in the center. Now hit the Play button at the top center area of the window.
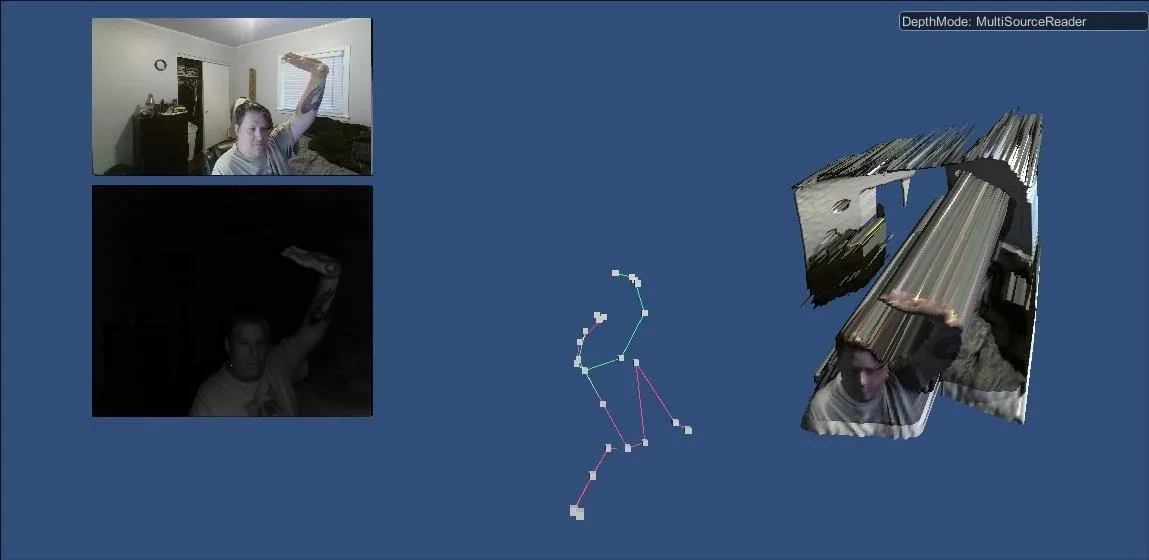
If your Kinect is set up correctly, you should see something very close to this.
With the test scene working, it's time to get the real application going. Hit the Play button again to stop game mode. Now click on the Assets folder again in the Project window. You should see two scenes in the right on the right window: Rx and Tx.
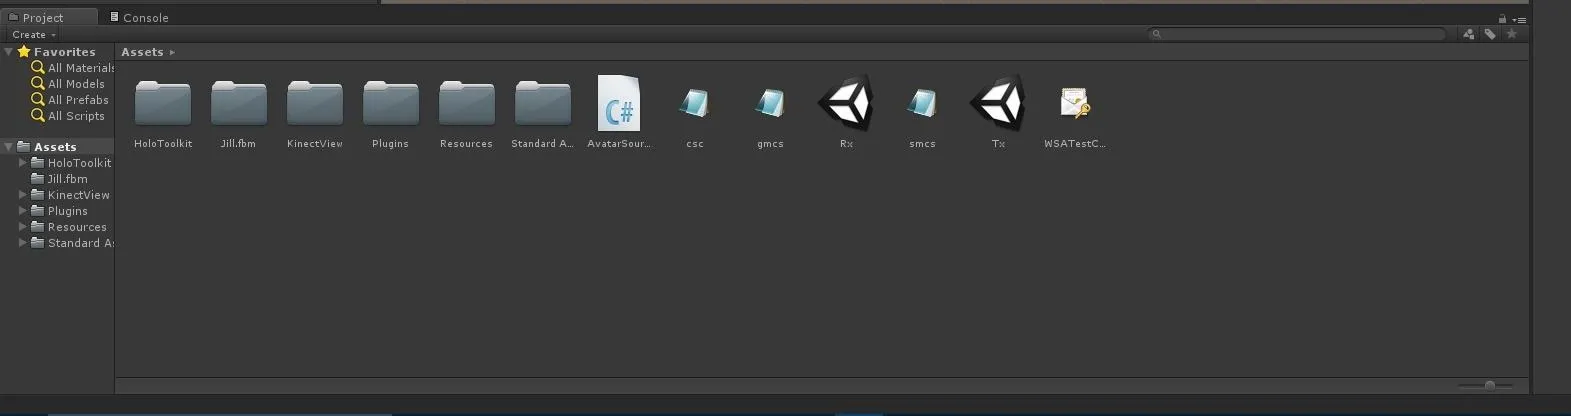
The Assets folder.
How does this work? The Rx build deploys and runs on the HoloLens. The Tx scene works as a standalone app, but can be run directly in Unity. They will both connect to the HoloToolkit Sharing Service.
Double-click on Rx. In the HoloToolkit Menu, go to the main menu, mouse over Configure, and click on Apply HoloLens Project Settings. Then, build,compile and deploy this scene to your HoloLens.
Now double-click the Tx scene. Under the HoloToolkit menu, select Launch Sharing Service and a DOS window will open. If it's your first time to run the Sharing Service, a permission window will pop up. You should allow the service to run and access your network.
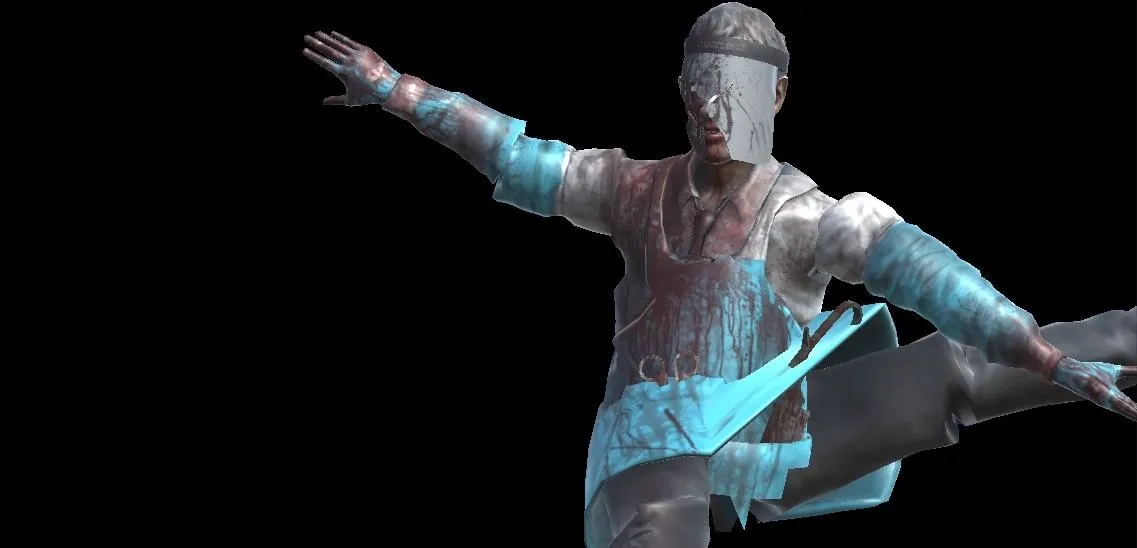
Hit the Play Button again. Wait a few seconds and then stand up in front of your Kinect. If everything is working, you should see Dr. Mortimer and the screen:
The smooth algorithms need some work still, but it's a great start.
Now Let's Try It Out : Testing the Application
Now that your app is up and running in Unity, it is time to run the HoloLens version. Put on your HoloLens, bloom to the start menu, air tap the plus on the right to go to the Apps list, and launch the app.
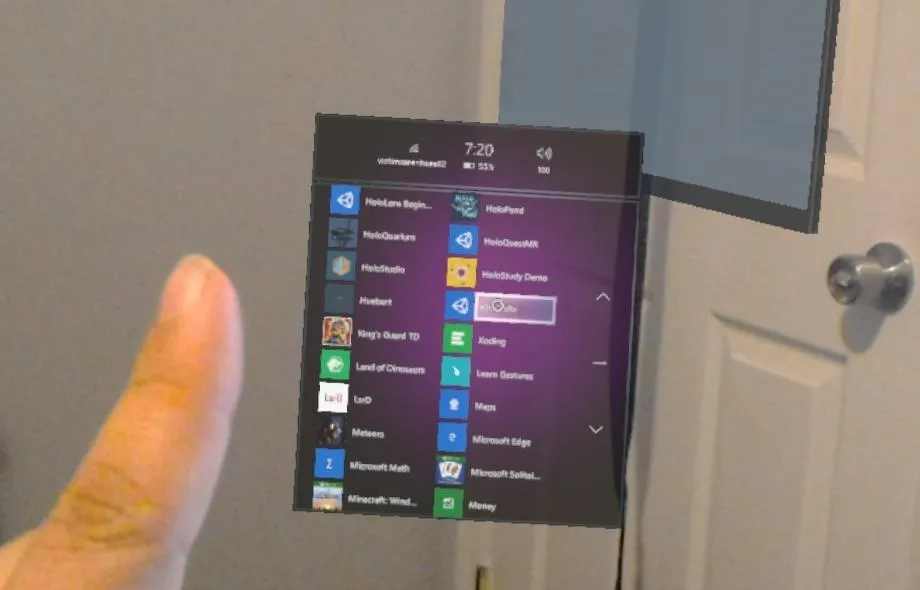
Air tap on KHL_TxRx to load Project Infrared on the HoloLens.
After a few seconds of the Unity Logo and a short wait for the data to reach the HoloLens, you should see something similar to the image below.
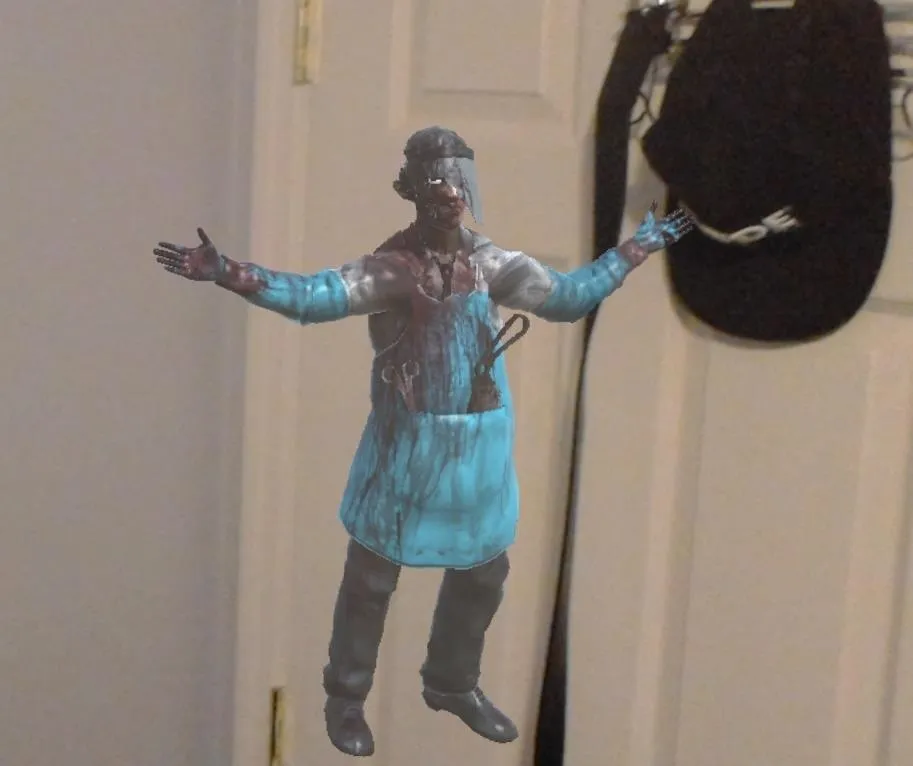
The Doctor is in... virtual space!
Congrats! You now have working motion-tracking. Dance around and see Mortimer dance as well. In its current state, there isn't a ton of options to dig into, but there are three avatars you can try. Look in the Avatar Source View, you can change the Avatar Asset Name from Mortimer to Jill or Parasite_L_Starkie by typing the name into the input field.
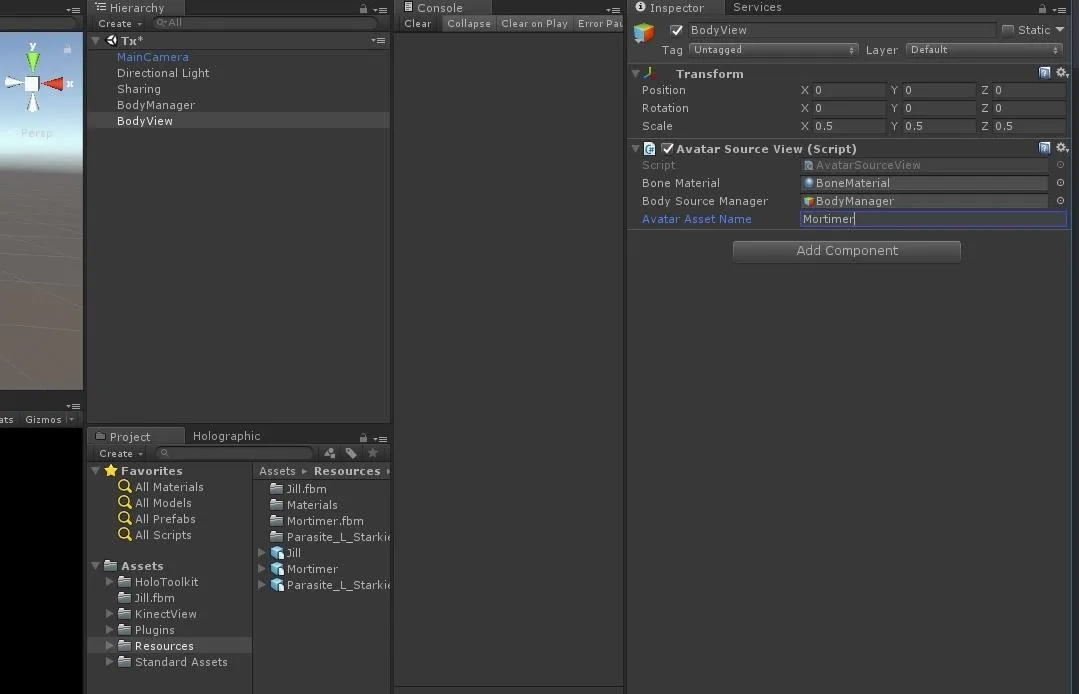
If you forget the avatar names, just look in the Asset/Resources directory.
Keep an eye on Wavelength's GitHub repository for updates and latest fixes. Once motion tracking improves over a few generations, we will likely see these types of setups more and more often. And who knows? Maybe next time Björk won't have to wear a suit to control her 3D avatar.
- Follow NextReality on Facebook, Twitter, and YouTube
- Follow WonderHowTo on Facebook, Twitter, Pinterest, and Google+
Cover image by Björk/Facebook; Screenshots by Jason Odom/NextReality


Comments
Be the first, drop a comment!