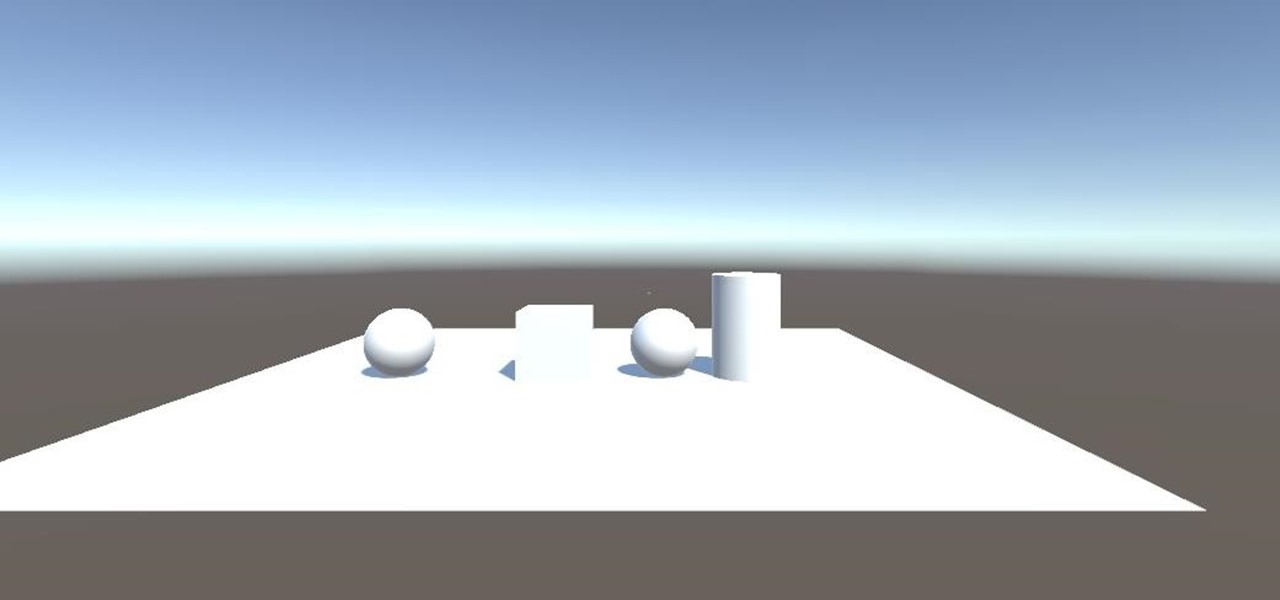

Now that we have installed the toolkit, set up our prefabs, and prepared Unity for export to HoloLens, we can proceed with the fun stuff involved in building a dynamic user interface. In this section, we will build the system manager.
On the most basic level, the system manager is a simple system that is designed to work the same with any 3D object that users want to add to their scene. If it is an object with a mesh and a renderer, then it should behave the same way for the user.
Unity has a few tools built in that are designed to help with this type of process: tags and layers. I utilized those tools in a previous version of this system I created, and it was clunky and not really what I was aiming for. So I made a rule that I would avoid using them for new objects in the scene.
In order for this type of setup to work without tags and layers, we need a smarter system that can tell when a new object has entered our scene. Now, once we have a complete project, we will instantiate an object and then hand it off to a list of objects. But for now, I needed to come up with something that did not rely on anything other than what is in the scene.
Why Do We Need a System Manager?
The reason we need a system like the one we are making here, simply put, is dynamic flexibility. In order to keep the system flexible, we need to avoid using tags and layers as new objects enter the scene. While we are avoiding certain elements of the Unity system for this, we do have components that need to be added to each to object as it comes into the scene. These will allow the main functions for the system to work; transform, scale, and rotation.
To facilitate this, the solution I arrived at, is a filtering system. To filter out any tool or system based objects, we will be using a tag for this purpose. Tagging our tools and objects that are part of the system, so they do not get in the way of the user.
Using an array and a list, we will compare them from FixedUpdate() frame to frame. While Update(), which we use commonly in Unity, is updated as soon as the frame is ready, FixedUpdate() has a fixed rate. Both options are highly inefficient, but FixedUpdate() is slightly less inefficient. The process requires getting a list of all objects in the scene every frame, which is slow. Then we compare the number of objects from the previous frame. If those numbers do not match, then we have to do a few things, such as add components to the objects; we'll cover this in-depth in a later chapter.
Let's see what this looks like.
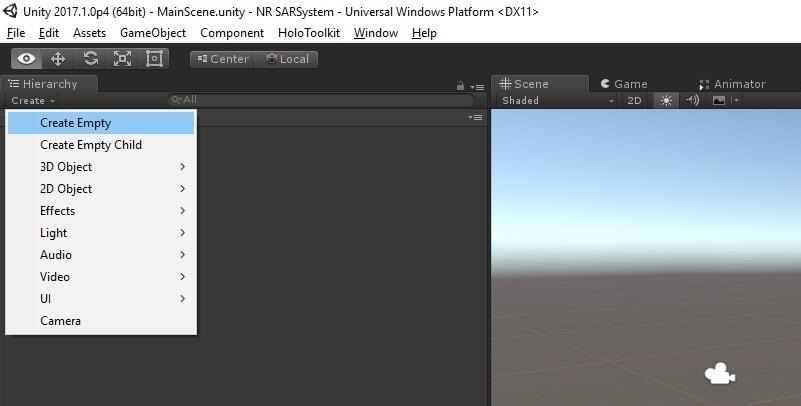
Step 1: Create the Manager Object
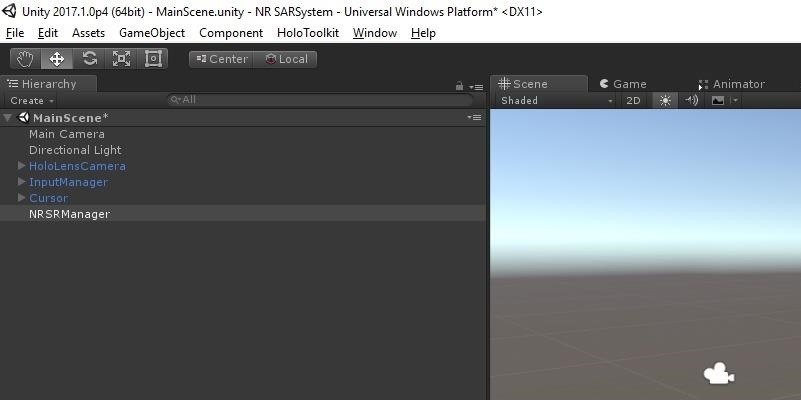
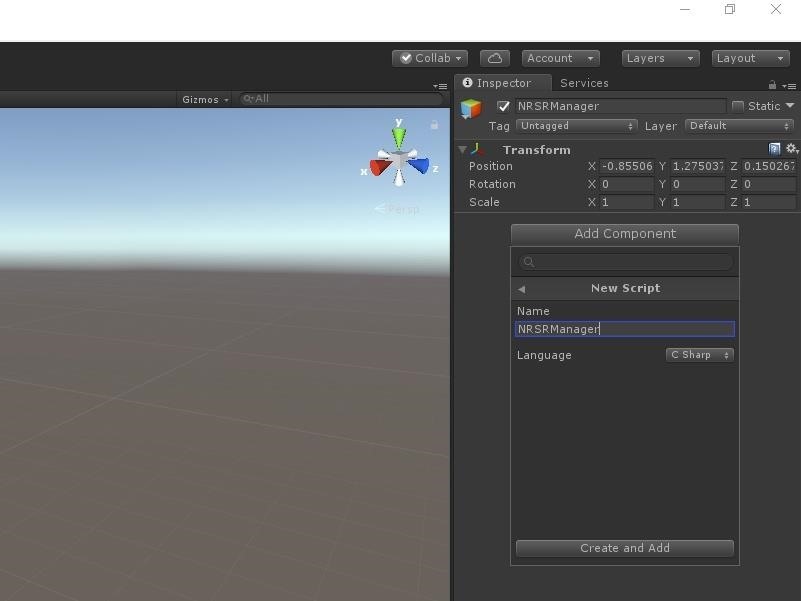
With Unity open and the project from the previous chapter open, create an empty object in the Hierarchy view and name it NRSRManager.
With NRSRManager selected, click on the "Add Component" button in the Inspector view. Click on "New Script" at the bottom of the choices.
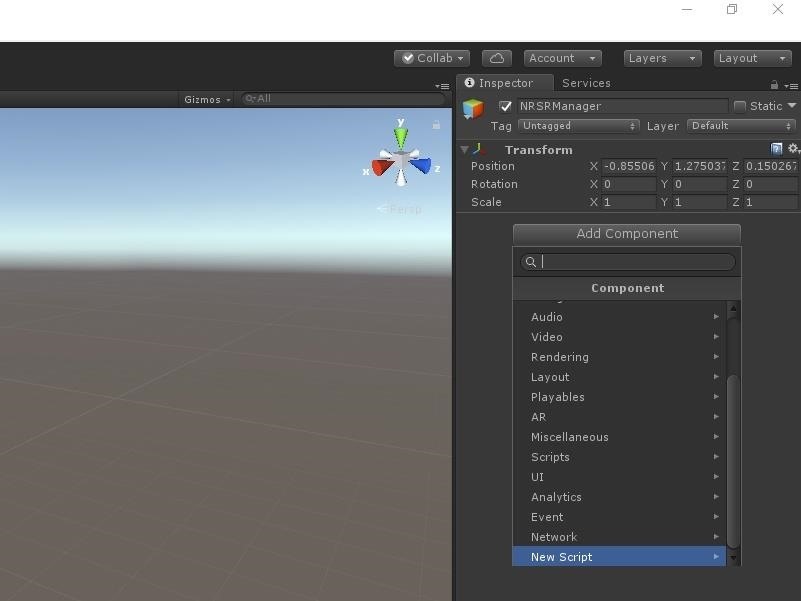
Type NRSRManager and click on "Create and Add."
Step 2: Declare the Variables
Double-click on the "NRSRManager" file to open it up in Visual Studio.
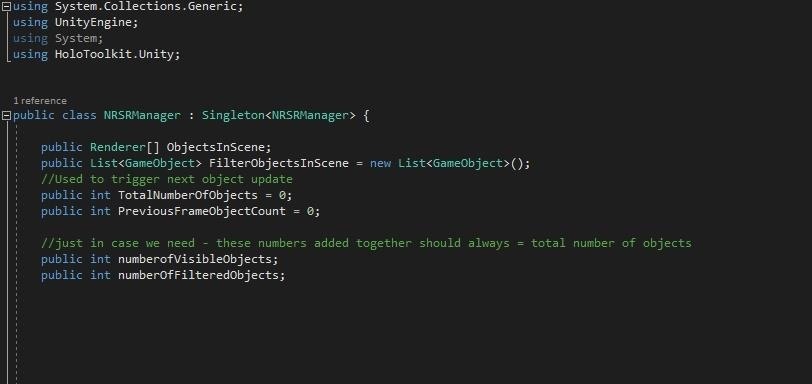
In this section of code, we will enter our using statements and declare some variables. Then in the class declaration, we will change MonoBehavior to Singleton<NRSRManager>, which makes the class easily accessible throughout the application.
Next, we declare the array of Renderers and the List of GameObjects mentioned in the explanation. Finally, we follow that up with four integers to keep count of various numbers of objects. Each int is named to its appropriate point.
Step 3: Check the Main Loop for Changes by Frame
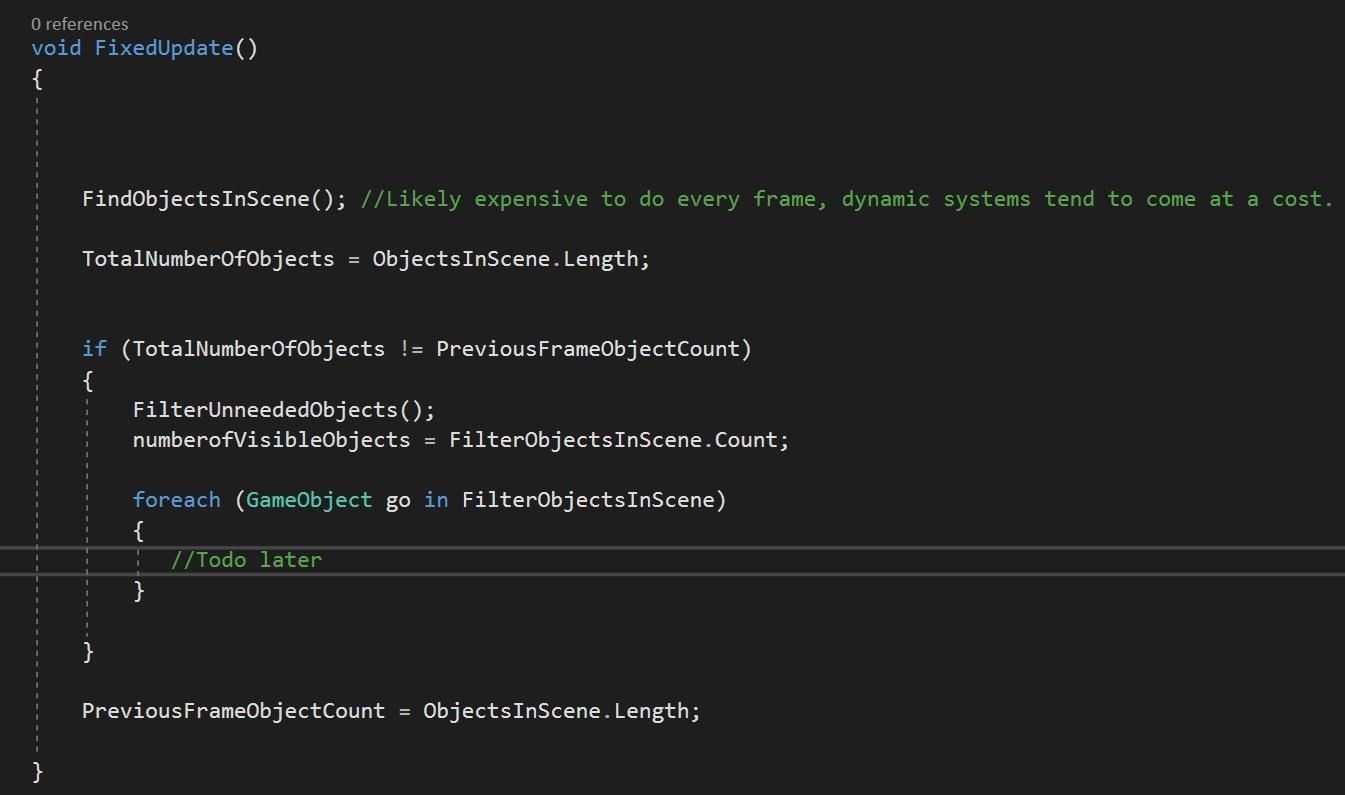
Next up, we have our FixedUpdate() method/event to check the array and list. FixedUpdate() is called every fixed frame rate frame, which is less often than the Update() that is called every frame.
First, we run the method FindObjectsInScene(), which we will cover shortly. We set the TotalNumbersOfObjects integer based on the total number of objects in the ObjectsInScene array.
Then, we test if the TotalNumbersofObjects is not equal to the PreviousFrameObjectCount. If that condition is false, we then filter out any tool or system objects and set the numberofVisibleObject variable equal to the number of GameObjects in FilterObjectInScene.
At this point, we loop through all of these filtered objects and perform tasks that we will go over in a later chapter.
Finally, we set the PreviousFrameObjectCount to the number of ObjectsInScene.
Step 4: Find All the Objects in the Scene
The first method that got called in our FixedUpdate() was FindObjectsInScene(). Here we clear our array and then using the FindObjectsOfType method we collect all of the objects with renderers in the scene into the array.

Step 5: Filter What Is Not Needed
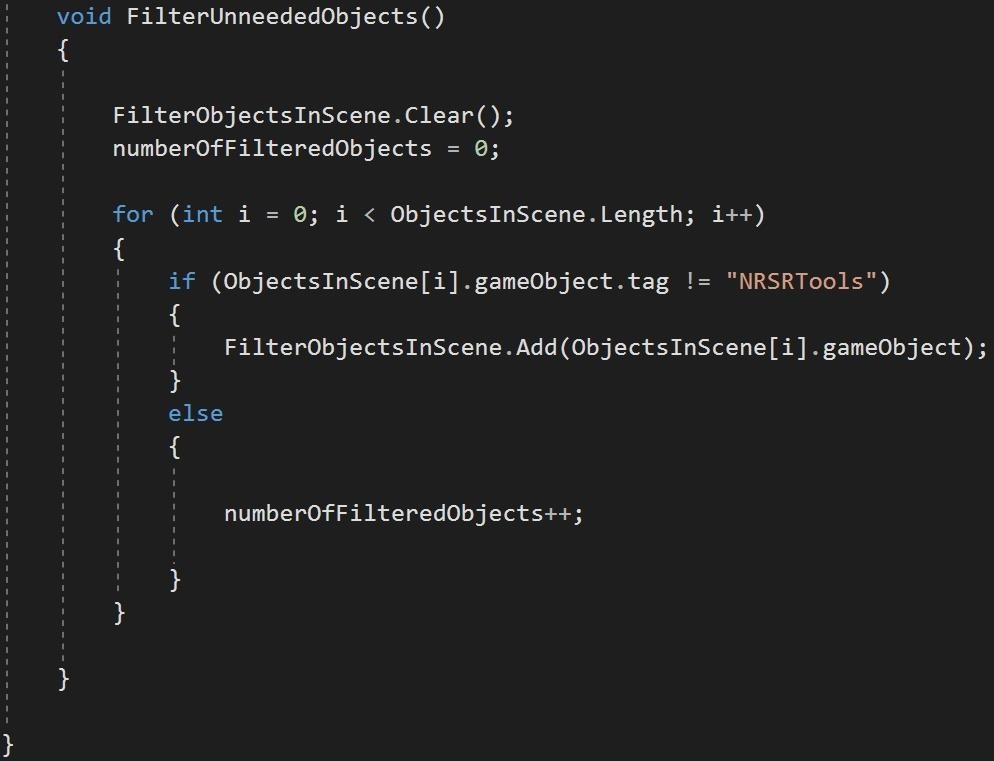
And finally, we have our FilterUnneededObjects() method.
Here, we clear our FilterObjectsInScene List<> and set the numberofFilteredObjects to zero. Then, we loop through all of ObjectsInScene and, if they did not have the NRSRTools tag, then we add them to the FilterObjectsInScene List<>. Otherwise, we add 1 to the numberOfFilteredObjects.
Here is a pastebin link to the whole .cs file to use for reference in case you are having issues putting it all together.
Step 6: See the Results at Work
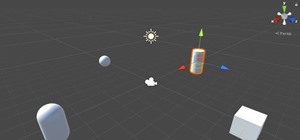
Now, if you run the application in Unity by hitting the "Play" button, then add a number of objects to the scene, and select a NRSRManager object, you should see something like this in the Inspector:
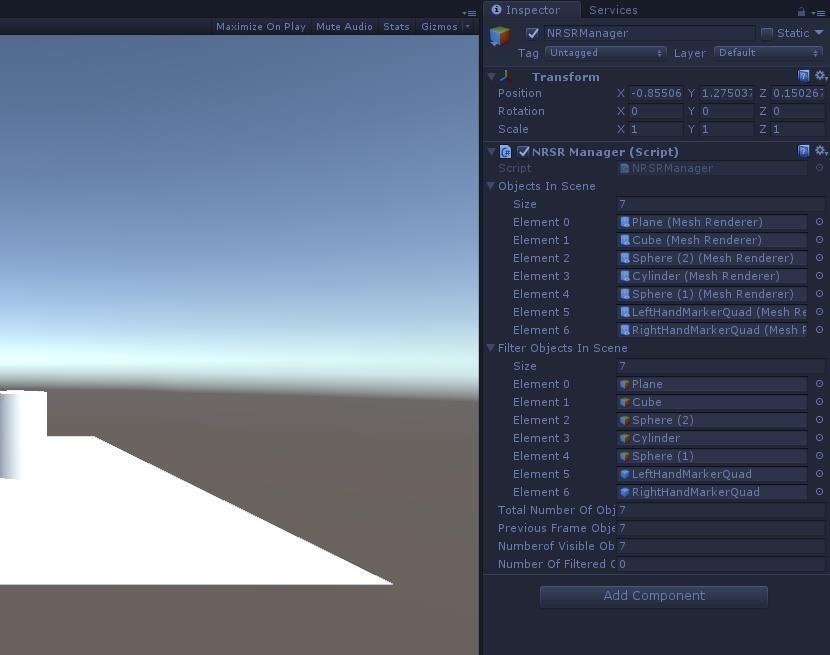
If you expand the Objects In Scene and Filter Objects In Scene, you should see a list of all the objects currently in the scene with a Renderer component.
The initial steps to getting the system up and going are done. Next up, we will begin working with the Gaze Input for the HoloLens so that we can get focused-based selection working. See you then.
Just updated your iPhone? You'll find new emoji, enhanced security, podcast transcripts, Apple Cash virtual numbers, and other useful features. There are even new additions hidden within Safari. Find out what's new and changed on your iPhone with the iOS 17.4 update.


1 Comment
Is there any chance to get the mentioned code?
Share Your Thoughts